Stereo Pairs

The method you're describing leverages a form of stereoscopic vision, where two images are placed side-by-side and, when the viewer crosses their eyes, the images merge into a single 3D or enhanced visual effect. This technique relies on how human vision processes depth and combines information from both eyes. Let's break down the process and underlying principles:
1. The Setup: Two Complementary Images (1R & 1L)
Objective: Place two images, one for the left eye (1L) and one for the right eye (1R), next to each other so that they are perceived as one fused image when viewed with a cross-eye technique.
Steps:
Design the Images: Create two slightly different images, one for each eye. These images should be similar in content but with small variations in the placement of objects or details. These differences mimic the slightly different perspectives that each eye would naturally have when looking at a real 3D object.
1R (Right Image): The image that will be seen by the right eye.
1L (Left Image): The image that will be seen by the left eye.
Side-by-Side Placement: The images are placed side by side, with 1L on the left and 1R on the right. The viewer is instructed to cross their eyes so that their left eye views the right image and their right eye views the left image.
2. How the Cross-Eye Viewing Technique Works
Human Vision System: The human brain creates depth perception through binocular vision, which means each eye captures a slightly different perspective of the same object. The brain then merges these two perspectives to create a sense of depth and three-dimensionality.
In normal viewing, the brain merges these perspectives automatically because the two eyes are looking at the same object from slightly different angles.
When using the cross-eye technique, you manually force your brain to combine two images that are side-by-side, each one meant for one eye, creating a 3D effect or an entirely new image depending on how the images differ.
Crossing the Eyes: By crossing your eyes, the left eye focuses on the image meant for the right eye (1R), and the right eye focuses on the image meant for the left eye (1L). This mismatch of visual input tricks the brain into merging the two images, which can create depth, hidden visuals, or motion effects.
3. Depth Effect: Creating the Illusion of Three-Dimensional Space
The depth effect is achieved by mimicking how our eyes view real objects in three dimensions:
Slight Horizontal Shift: In real life, each of your eyes sees an object from a slightly different angle due to the space between your eyes (about 6-7 cm). To replicate this, the two images, 1L and 1R, are created with small horizontal shifts in object placement. This shift mimics the perspective difference seen by each eye.
1L (Left Eye): Objects might appear slightly shifted to the right.
1R (Right Eye): Objects might appear slightly shifted to the left.
Merging for Depth: When the brain merges these two images, it interprets the difference in placement as a depth cue, resulting in the perception of three-dimensionality. Objects that are shifted more drastically between the images appear to be closer, while objects with little or no shift seem farther away.
4. Special Effects: Enhancing the Third Image with Differences Between 1L and 1R
The magic of this technique lies in how differences between the two images create additional effects beyond just depth:
Complementary Elements: By designing 1L and 1R with intentional differences, you can create hidden or special effects in the fused image. For example:
Details Exclusive to One Image: Add specific visual elements (like a small shape or color change) to 1L but not 1R. When the brain merges the two images, it will create a sense of discovery as the viewer perceives the hidden details only when the images are combined.
Complementary Object Parts: Imagine a simple object that is missing a part in 1L (e.g., the left half of a circle) and is missing another part in 1R (e.g., the right half of the circle). When the viewer crosses their eyes, the two halves come together, creating the perception of a complete object that doesn’t fully exist in either image alone.
Animated or Dynamic Effects: By slightly altering the position of objects between 1L and 1R, the viewer can perceive motion in the fused image. This can simulate the effect of an object rotating or moving between frames.
Subtle Shifts: Small changes in the position or orientation of an object between the two images can make the object seem like it is rotating, moving forward, or backward in space.
Fluctuating Focus: Objects that are more distinct in 1L but blurred in 1R (or vice versa) can appear to shift in focus as the eyes adjust, creating a dynamic viewing experience where parts of the image seem to "come into focus" or fade out depending on the viewer's perception.
5. Why This Works: The Science Behind Human Visual Processing
The ability to fuse two slightly different images into one coherent whole relies on how the brain interprets visual stimuli:
Binocular Disparity: The brain's ability to take two slightly different images from each eye and merge them into a single image with depth perception is known as binocular disparity. This allows us to perceive distance, volume, and spatial relationships between objects.
Visual Cortex Processing: When your eyes send the slightly different images (1L and 1R) to your brain, the visual cortex works to merge these images by aligning key details. This results in the perception of one unified image. The differences between the two images are interpreted as depth, or they can be used to create special effects like the perception of hidden details or motion.
Tricking the Brain: By crossing the eyes, we are tricking the brain into thinking it is seeing a three-dimensional object or an object in motion, even though the two images are flat. The brain is particularly sensitive to small differences in perspective, so even minimal variations between 1L and 1R can produce significant depth or motion effects.
Example of the Process in Action:
Step 1: Design two images, 1L and 1R, where a tree is slightly shifted to the right in 1L and slightly shifted to the left in 1R. This slight offset between the two images will create depth when the viewer crosses their eyes, making the tree appear three-dimensional.
Step 2: Add a bird to 1L that is absent from 1R. When the viewer merges the two images, the bird will seem to appear from thin air, creating a hidden detail effect.
Step 3: Introduce slight movement by changing the shape of the bird’s wings between 1L and 1R. When the images are viewed in combination, the brain will interpret this as the bird flapping its wings, adding a sense of motion to the scene.
This method takes advantage of the brain's natural visual processing to create rich, dynamic images from simple 2D art. By manipulating small differences between left and right images, artists can create stunning effects that feel alive with depth and motion.

Detailed Technique for Creating a Three-Frame Optical Illusion Animation Using Left and Right Eye Switching (1L, 1R, 1LR)
This technique takes advantage of how our binocular vision and brain's perception work together to interpret visual information, creating an effect that involves two images, left (L) and right (R), which are combined into a third, merged image (LR). By carefully designing the left and right images, you can create a three-frame animation that unfolds through the simple action of winking one eye, then both eyes, and repeating in rapid succession.
Below is a detailed breakdown of how to design this effect, how the eyes process these images, and how to add additional optical effects for enhanced illusions.
Step 1: Understanding the Binocular Vision Basis
Binocular Vision: Humans typically see with both eyes open, and each eye provides slightly different perspectives. The brain merges these two perspectives into a single coherent image, giving us depth perception and the ability to see objects in 3D.
Eye Winking Mechanism: When one eye is closed, the brain relies on the remaining eye's perspective. If the other eye is then opened, the brain merges both perspectives into a new image. By quickly alternating which eye is open or closed, it is possible to "toggle" between two distinct images and the merged version.
Step 2: Designing the Left and Right Images (1L and 1R)
Left Image (1L):
The left image (1L) should contain a distinct part of the overall composition, which the viewer can focus on when only the left eye is open.
This image can either be incomplete, missing details that are only visible when the right eye is open or when both are used.
Example: A figure in a landscape where the left image shows the figure without key elements like arms or background details.
Right Image (1R):
The right image (1R) should complement or contrast the left image, containing information that’s missing from the left image or showing another perspective.
Example: The right image could reveal the background scene, or show the figure with different facial expressions or body positioning.
By alternating between 1L and 1R, the viewer gets two distinct perspectives of the same scene, potentially showing motion or change in details.
Step 3: Creating the Merged Image (1LR)
The merged image (1LR) is what the viewer perceives when both eyes are open and the brain combines the visual data from both eyes. This merged image should appear as a complete, cohesive composition that blends elements from both 1L and 1R.
Merged Details: The missing or incomplete elements in the left and right images should be filled in when both eyes are open.
Example: When both eyes are open, the figure from the left image becomes complete (adding missing arms or background), or movement such as the figure reaching out, becomes fully visible.
Step 4: The Three-Frame Animation Process
This technique creates a three-frame animation by the simple action of winking one eye at a time and then using both eyes. Here’s how it works:
Frame 1 (1L - Left Eye Open): The viewer sees only the left image, which could be missing details or showing a distinct state of the scene.
Example: The figure is standing still or appears incomplete.
Frame 2 (1LR - Both Eyes Open): The viewer’s brain combines both images into the merged image. This image contains the full scene, showing all the details from both images blended together.
Example: The figure is now complete, perhaps showing motion or additional detail in the background.
Frame 3 (1R - Right Eye Open): The viewer sees only the right image, providing the alternative perspective or missing details from the left side.
Example: The figure may have a different pose or expression.
By quickly alternating between winking left (1L), both eyes open (1LR), and right (1R), the viewer perceives these three frames in rapid succession, creating a sense of motion or transformation. The brain experiences it as an animated transition, especially if the change between the images is gradual but noticeable.
Step 5: Optical Illusions and Effects for Enhanced Animation
To take this concept further, you can add optical illusions and visual tricks based on how the human eye works. Here’s how additional effects can be applied:
A. Exploit Persistence of Vision for Fluid Motion
The human brain tends to retain an image for a fraction of a second after it’s seen (called persistence of vision). By designing the left and right images with slightly different states of motion and quickly alternating between them, the brain merges these frames into a continuous, fluid motion.
How it works: For example, if the left image shows a figure lifting an arm, and the right image shows the figure fully extending the arm, when alternated quickly, the brain perceives the arm moving in real time.
B. Using Depth Perception for 3D Effects
By slightly shifting the perspective between the left and right images, you can create a stereoscopic 3D effect. This exploits binocular disparity, where the brain merges two different viewpoints to perceive depth.
How it works: The left and right images should have a slight parallax shift (where objects are positioned slightly differently in each image), so that when both eyes are open, the viewer perceives depth in the merged image.
C. Chromatic Aberration and Color Illusions
Incorporate chromatic aberration by using slightly different color filters in the left and right images. For example, use cool tones (blue/green) in the left image and warm tones (red/yellow) in the right image. When combined, this creates a vibrating optical effect where the colors blend but appear to shimmer or move.
How it works: This can amplify the feeling of depth or motion because the eyes struggle to fully merge the differing color channels, creating a sense of tension or vibration between the images.
D. Applying Motion Blur in Key Areas
By adding subtle motion blur to parts of the left and right images, particularly in areas that are supposed to be moving, you can enhance the perception of motion when alternating between the images.
How it works: For example, if the left image has the figure's arm half-raised with slight motion blur, and the right image has the arm fully raised with motion blur in the opposite direction, the rapid alternation will make it appear as though the arm is lifting in real time.
Step 6: Quick Succession for Animation
To fully simulate motion using this three-frame system (1L, 1LR, 1R), it’s crucial to set a rhythmic cadence for eye switching:
Wink Left Eye (1L) → Both Eyes Open (1LR) → Wink Right Eye (1R) should occur in a loop.
The timing of winks can vary based on how fast or slow you want the animation to feel.
Fast Winking: Creates a more rapid sense of motion, perfect for more dynamic scenes.
Slower Winking: Emphasizes the changes between frames, creating a more surreal, stop-motion effect.
By experimenting with the wink speed, users can control the pace of the animation, allowing for a customized experience where they "animate" the image themselves.
Conclusion: Designing a Multi-Frame Illusion for Animation
This technique leverages both the mechanics of the human eye and the brain’s perception of motion, depth, and blending. By alternating between left-eye only, right-eye only, and both eyes open, you can create a three-frame optical illusion that acts as a manual animation sequence. Adding optical illusions like chromatic aberration, motion blur, or stereoscopic effects can enhance this experience, tricking the brain into seeing not just separate images but motion, depth, and transformation.
Would you like to experiment with specific images using this technique, or explore further applications of these principles in art?
Advanced Methodology for Creating Mirrored and Superimposed Optical Effects
In this approach, we will explore how an image can be superimposed, mirrored, and flipped (1L, 1R, 1RM, 1LM, etc.) to create complex, shifting frames that evolve into a more dynamic animation sequence. This method is a continuation of dual imagery techniques but takes it to a more sophisticated level by incorporating mirroring, flipping, and the introduction of hidden elements. This advanced method also exploits how the eyes process symmetry and visual transitions to form animations or illusions.
Step 1: Base Image and Complementary Design (1L and 1R)
Begin by designing the core left image (1L) and right image (1R), making sure that:
Complementary Structure: Both images contain missing or incomplete elements that complement each other when combined. For example, 1L could contain the outline of a figure while 1R contains internal details or textural information.
Hidden Elements: Embed hidden elements or shapes that are not visible when each image is viewed independently. These could be abstract shapes, symbols, or even partial outlines that only become visible when the two images are viewed together.
Step 2: Introducing Mirrored Frames (1RM and 1LM)
Now, take the right image (1R) and create a mirrored version (1RM) by reflecting it horizontally or vertically, depending on the effect you want to achieve. Do the same for the left image (1L), creating its mirrored counterpart (1LM). The mirrored images will now create new interactions and shifts when superimposed:
1RM: Right image flipped horizontally, revealing hidden symmetry.
1LM: Left image flipped, creating a new perspective that interacts with both 1L and 1R.
By alternating between the original and mirrored versions, the visual system is forced to reconcile reflected and real details, creating a fluid transition.
Step 3: Flipping and Rotational Effects (1RW, 1LW, 1RMW)
Next, create flipped versions of the right and left images. Denote these images as 1RW (right flipped horizontally) and 1LW (left flipped). Introduce a full flip (both horizontally and vertically) to create 1RMW and 1LMW. These additional transformations add layers of complexity to the interaction:
1RW and 1LW: These images add another layer of complexity by completely flipping each image horizontally.
1RMW: This is the most advanced version, where both mirroring and flipping are applied to the right image.
The goal is to create an intricate web of interactions where each transformation reveals new components that were otherwise hidden or incomplete.
Step 4: Superimposition of Mirrored and Flipped Images
Once the original, mirrored, and flipped versions of the images are created, the key is in superimposing them in sequence. This creates the illusion of motion or depth as the images transition between states:
Superimpose 1L and 1RM: When the left image (1L) is superimposed with the mirrored version of the right image (1RM), hidden symmetries emerge that were not visible in the individual images.
Superimpose 1L and 1LM: Superimposing the left image with its own mirrored version (1LM) can reveal new perspectives that weren’t visible before, forming a third, more complex image.
These interactions allow for hidden visual information to be revealed gradually as the viewer alternates between the various transformations.
Step 5: Creating Animation Sequences
By transitioning between these mirrored and superimposed frames in rapid succession, an animation effect is produced. This works because the eye sees each frame as distinct, but the brain perceives the sequence as a form of motion. Here’s a sample sequence using notation:
1L (Left Eye Open): Viewer sees the base left image.
1R (Right Eye Open): Viewer sees the complementary right image.
1LR (Both Eyes Open): Viewer sees the combined image of 1L and 1R.
1RM (Right Eye Mirrored): Transition to the mirrored version of the right image (1RM).
1LM (Left Eye Mirrored): Transition to the mirrored version of the left image (1LM).
1RMW: Apply both mirroring and flipping to the right image.
When these frames are viewed in quick succession, the result is a multi-layered animation where the viewer perceives continuous motion through the eyes alternating between these states.
Step 6: Exploiting Optical Effects for Enhanced Visual Illusions
Now, let's add more complexity by leveraging specific optical illusions that exploit how the eyes process symmetry and depth:
A. Depth Perception and Stereoscopic Effects
You can manipulate the way images are shifted slightly between 1L and 1R to introduce parallax, making the superimposed frames appear to have depth. When the images are combined, the brain processes this subtle shift, creating the perception of 3D depth.
Technique: Adjust the alignment of key features (like a tree branch or the corner of a house) so that they appear in slightly different positions between the left and right frames. This will produce a stereoscopic effect when the images are combined.
B. Chromatic Aberration
By applying slight variations in color channels between 1L and 1R, you can introduce a form of chromatic aberration where the viewer perceives color shifts or highlights. When these frames are superimposed, they will create a vibrating, almost moving effect due to the differences in color alignment.
C. Persistence of Vision
When flipping between frames (e.g., 1L, 1R, 1RM) in quick succession, you can rely on the brain’s persistence of vision to create the illusion of smooth motion. The key is in the timing of how long each frame is visible. The brain retains the previous image for a brief moment, allowing you to simulate movement.
Step 7: Advanced Superimposed Animation Sequence
Using all of these techniques together, you can create a complex, flipped, mirrored, and stereoscopic sequence:
1L (Left) → 1R (Right): Alternating between these creates the base animation.
1LM (Mirrored Left) → 1RM (Mirrored Right): Introduce mirrored versions to the sequence, creating symmetrical shifts.
1LW and 1RW (Flipped Versions): Add flipped frames for further disorientation and animation complexity.
1LR (Superimposed): Finally, combine the left and right images into a superimposed frame, revealing a third hidden image.
Conclusion: Infinite Combinations of Optical Illusions
By applying this combination of mirroring, flipping, and superimposition, the viewer is presented with a dynamic, evolving visual experience. Each transformation adds layers of symmetry, depth, and hidden details, which can be animated through the alternating frames. When combined with stereoscopic depth, color shifts, and persistence of vision, this creates a highly interactive and visually rich animation sequence.
This technique pushes the boundaries of dual imagery into a more complex space, where both illusion and motion are seamlessly integrated, offering endless possibilities for exploration and creativity.
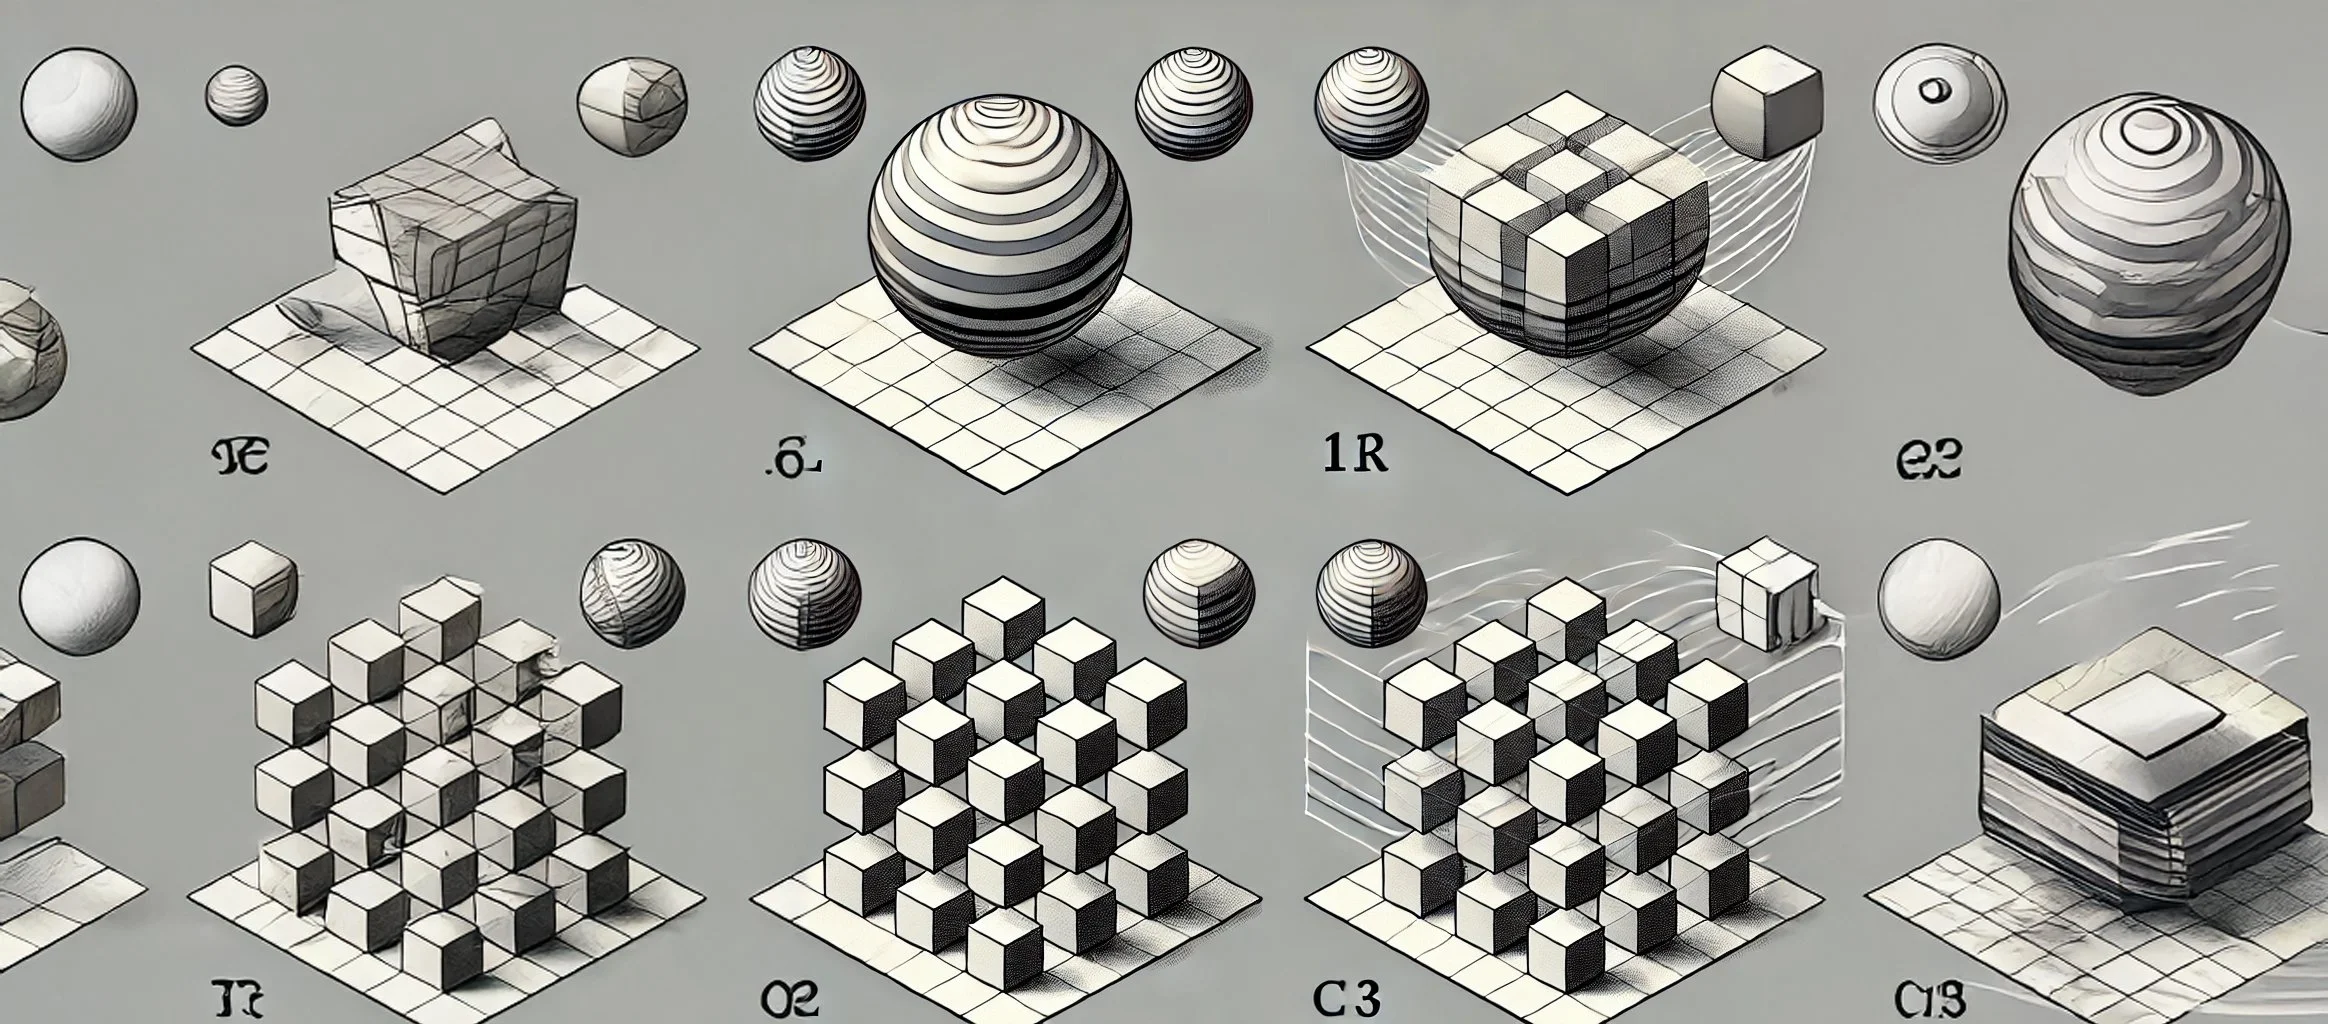
How to View the Image and Activate the Multi-Frame Animation Effect:
This image demonstrates the superimposed optical effect technique. To experience the animation, follow these steps:
Prepare to Cross Your Eyes: Position yourself comfortably at a distance where you can see both images side by side clearly.
Identify the Convergence Points:
CP1: Top left of both images.
CP2: Center of both images.
CP3: Bottom right of both images.
Viewing Process:
Start by focusing on CP1 in both images. Cross your eyes so that the two shapes (sphere and cube) begin to overlap.
As the images merge at CP1, you should begin to notice a slight shift in perspective, where the objects start rotating together.
Next Convergence Point: Shift your focus from CP1 to CP2 (center of both images).
As the focus moves from CP1 to CP2, the objects (sphere and cube) will seem to move more dynamically, revealing a hidden central object (a combination of both shapes).
Final Convergence: Move to CP3 (bottom right).
The animation effect completes as the focus moves through CP3, creating the illusion of rotating shapes as they fuse together in a smooth motion.
As you alternate focus between these convergence points in sequence, you will notice subtle animations and depth changes. The image plays with the brain's stereoscopic vision and depth perception to create this dynamic visual effect.