Stereo Animations
Stereo Animation Technique Using Eye Cross-Focus
The Stereo Animation technique is based on the concept of stereoscopic vision, where two slightly different images (usually placed side by side) are designed to be viewed simultaneously by crossing your eyes. This technique allows the brain to merge the two images into one 3D image. By quickly alternating focus between one eye and the other, you can simulate a simple animation effect, creating the illusion of movement or transition between the two images. Here’s a detailed breakdown of how the process works, followed by a suggestion for creating an example based on the images provided.
Step-by-Step Explanation of Stereo Animation
1. Image Preparation
The first step involves creating two images that are similar but not identical. These images should contain slight variations in perspective or motion, which can then be perceived as movement or transformation when the viewer alternates their eye focus.
Left Image (1L): The image viewed by the left eye when focusing.
Right Image (1R): The image viewed by the right eye.
Both images should be placed side by side on a canvas, without any overlap.
2. Cross-Focus Method (Viewing the 3D Effect)
This technique involves the viewer crossing their eyes in a controlled way to merge the two images into one.
Cross Your Eyes: Look at the two images side by side and slowly cross your eyes until a third image appears in the middle. This middle image is a merged version of the two original images, creating the illusion of depth and 3D space.
Maintain Focus: The brain automatically merges the slightly different angles from both images into a single 3D image, similar to how binocular vision works to create depth in the real world.
3. Animation Effect via Eye Alternation
To create the illusion of animation:
Cover the Right Eye (1L): When the right eye is covered, the left image (1L) dominates the view, showing the object or figure in its first position.
Cover the Left Eye (1R): When the left eye is covered, the right image (1R) dominates the view, showing the object or figure in its second position (with a slight variation from 1L).
Quick Alternation: By rapidly alternating between covering the right and left eyes, the viewer’s brain sees the object moving between these two positions, creating an illusion of motion or transition.
When done in rapid succession, the transition between the two positions becomes more fluid, giving the appearance of movement or animation.
Using the Provided Images

For the provided images, the stereo animation technique can be applied as follows:
Prepare the Images:
One image shows a figure or movement (such as an anatomical study of the human body in motion).
A slightly varied second image should show the same figure in a different pose or position.
Place the Images Side by Side: Align these two images side by side, ensuring that the corresponding features (e.g., head, arms, legs) are aligned horizontally so the viewer can easily merge them into one image when they cross their eyes.
Viewing the Animation:
Ask the viewer to cross their eyes until the two images merge into a third central image, creating a sense of depth.
They can then alternate between the two images by covering and uncovering one eye, thus simulating a basic animation of the figure in motion.
Additional Techniques for Enhancing the Animation
To enhance the animation effect and make it smoother:
Gradual Transition: The two images can be designed with more gradual differences, ensuring that the motion appears smooth when alternating between the two.
Multiple Frames: By using more than two images (e.g., a sequence of 3–4 images), a more complex animation can be created. The viewer can alternate between multiple states, enhancing the illusion of fluid motion.
Color and Light: Varying the lighting or coloring between the left and right images can further emphasize the illusion of depth and motion, as different light angles or shading changes as the viewer alternates between images.
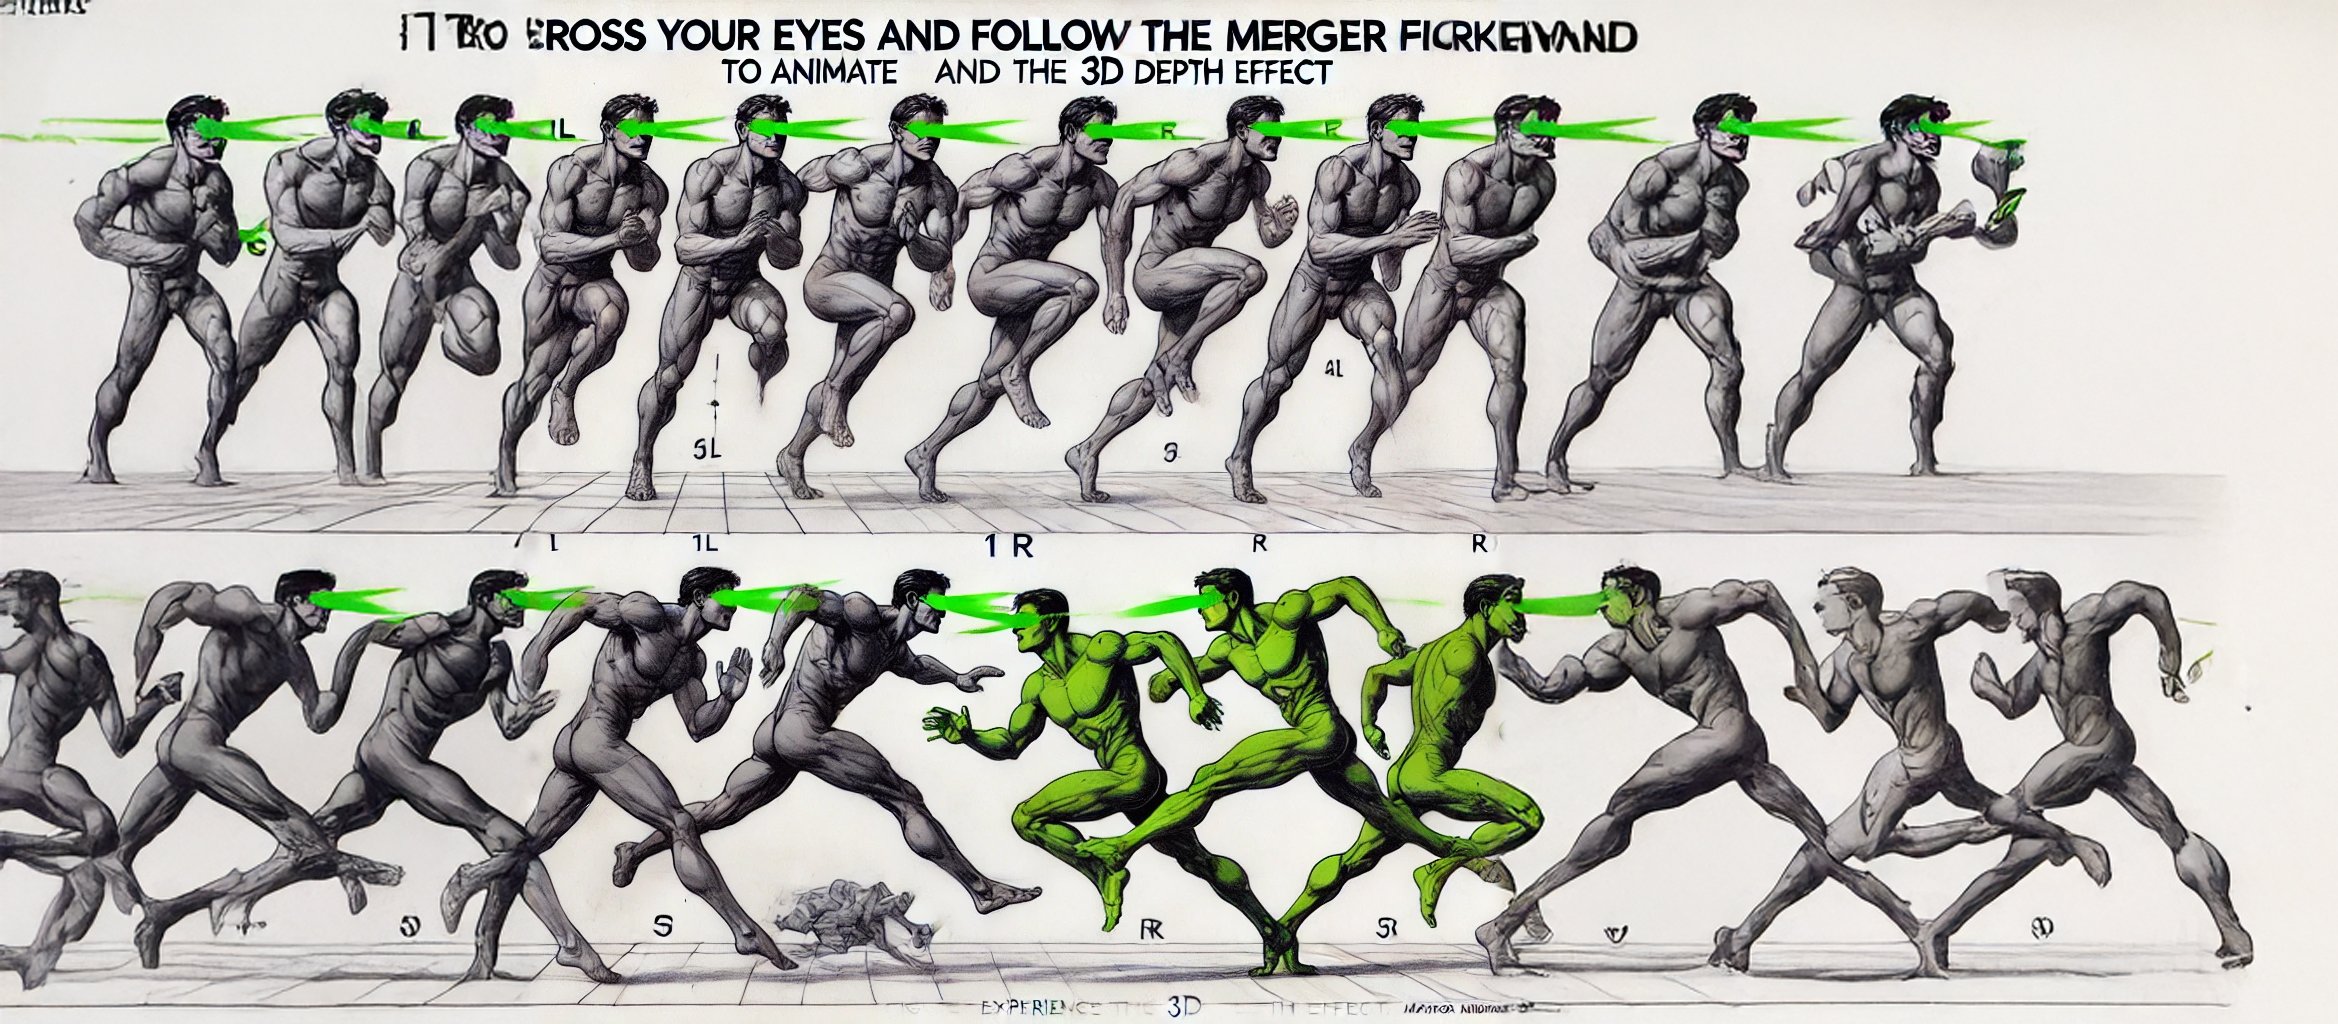
To enable an animation effect by combining multiple figures within a single image and using Merger Markers, we can design the images so that each figure represents a different frame of the animation sequence. By merging the figures step-by-step or using an apparatus, the viewer can experience a fluid, multi-frame animation.
Here's a breakdown of how this can be done:
1. Multi-Frame Animation with Eye-Controlled Merging
Concept: Each figure represents one "frame" of an animation (similar to a stop-motion sequence). By crossing their eyes and focusing on specific pairs of merger markers, the viewer can sequentially "merge" two figures at a time, creating the perception of movement between frames.
How to achieve this:
Place multiple figures (each in a different pose) side-by-side in the image.
Add bright, exaggerated Merger Markers at different positions around each figure.
The viewer starts by crossing their eyes to merge the first two figures and then shifts their focus to the next marker pair, which merges the second and third figures, continuing the sequence.
Visualization Method:
Eye Crossing: The user crosses their eyes to merge two figures and moves through the sequence.
Sequential Merging: The figures are arranged in such a way that each pair of merged images reveals a new movement. As the viewer moves through the markers (from top left to bottom right), the figures appear to animate in sequence.
Example:
Using the third image you uploaded (with the dynamic poses), each figure can represent a different stage of the motion. By adding merger markers above or beside each figure, the viewer can follow the sequence from one movement to the next.
2. Apparatus for Enhanced Viewing:
Apparatus with Reflective Surfaces: Another way to enhance the viewing experience is to use mirrors or a specialized device. This apparatus can help guide the eyes to merge figures automatically, creating smoother transitions between frames without the need for the viewer to manually cross their eyes.
How the Apparatus Works:
Mirrors are placed at angles that reflect parts of the image (each figure in the sequence) into the viewer's field of view.
The mirrors automatically align the figures into a combined view, so the viewer experiences the motion as if looking through a stereoscopic viewer.
Potential Devices:
Headset with Reflective Lenses: The viewer wears a headset that contains small reflective lenses. Each lens is positioned to reflect one frame (figure) of the animation. As the viewer shifts their head or moves their eyes, they see each figure in succession, creating a fluid motion.
Rotating Mirror Device: A simple, rotating mirror device could guide the viewer's focus between the figures. As the mirrors rotate, each frame of the animation is brought into view.
3. Interactive Animation via Winking and Eye Control
Winking as Control: The viewer could control the animation sequence by alternating winks. For example, winking with the left eye activates one merger marker, while winking with the right eye shifts to the next one.

How Winking Controls the Animation:
Each figure has merger markers corresponding to the left and right eyes. By alternating winks, the viewer "selects" which figure to focus on.
As they switch between winks, the images merge and create an illusion of animation, as if the figure is moving.
Steps to Create the Final Example:
Create the Frames: Use multiple poses (like in the figures in the third image). Each figure represents a single "frame" of a larger animation.
Place Merger Markers: For each pair of figures, add bright merger markers to guide the viewer's eyes. Start with the top left for the first two figures, then top right for the next pair, and so on.
Enable the Animation: As the viewer crosses their eyes and focuses on each marker, the figures will appear to move, creating a seamless transition between poses.