Directions - Layout
Step 1: Basic Layout & Character Composition
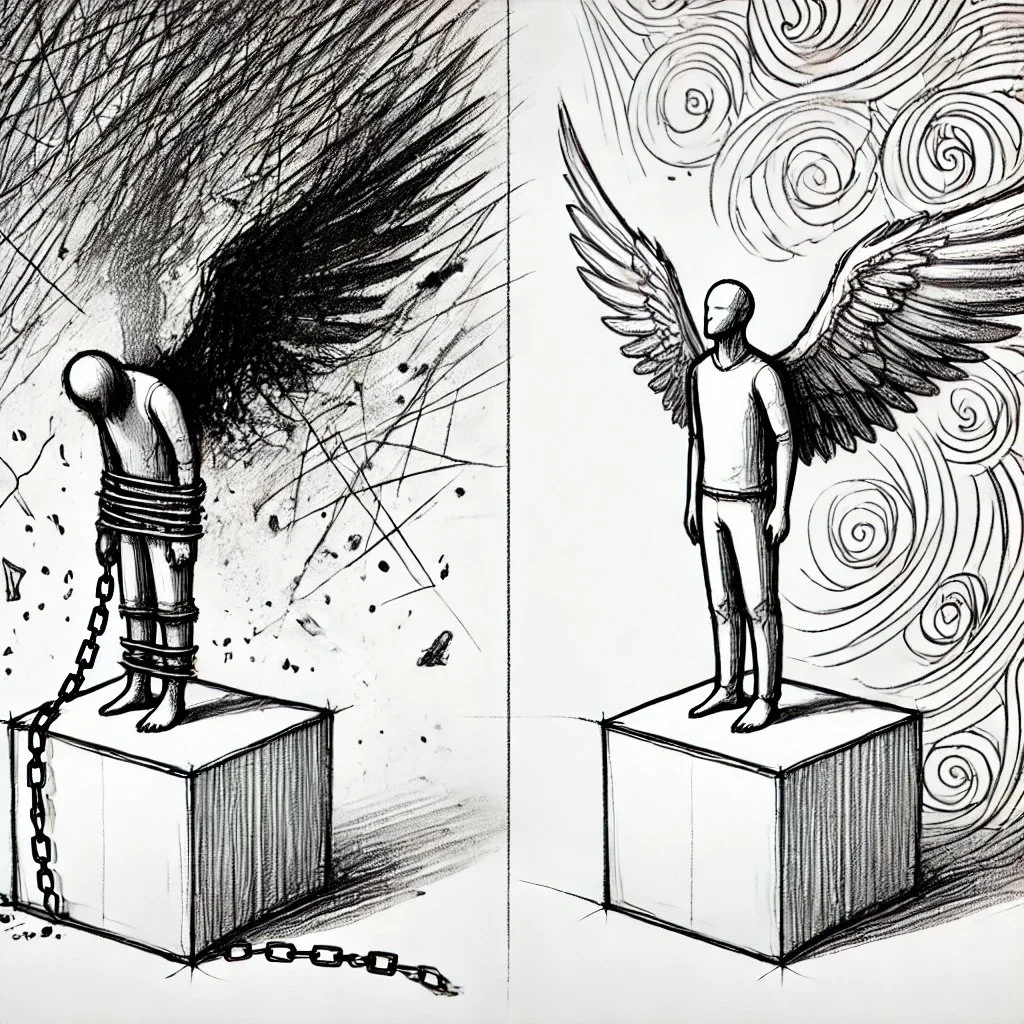
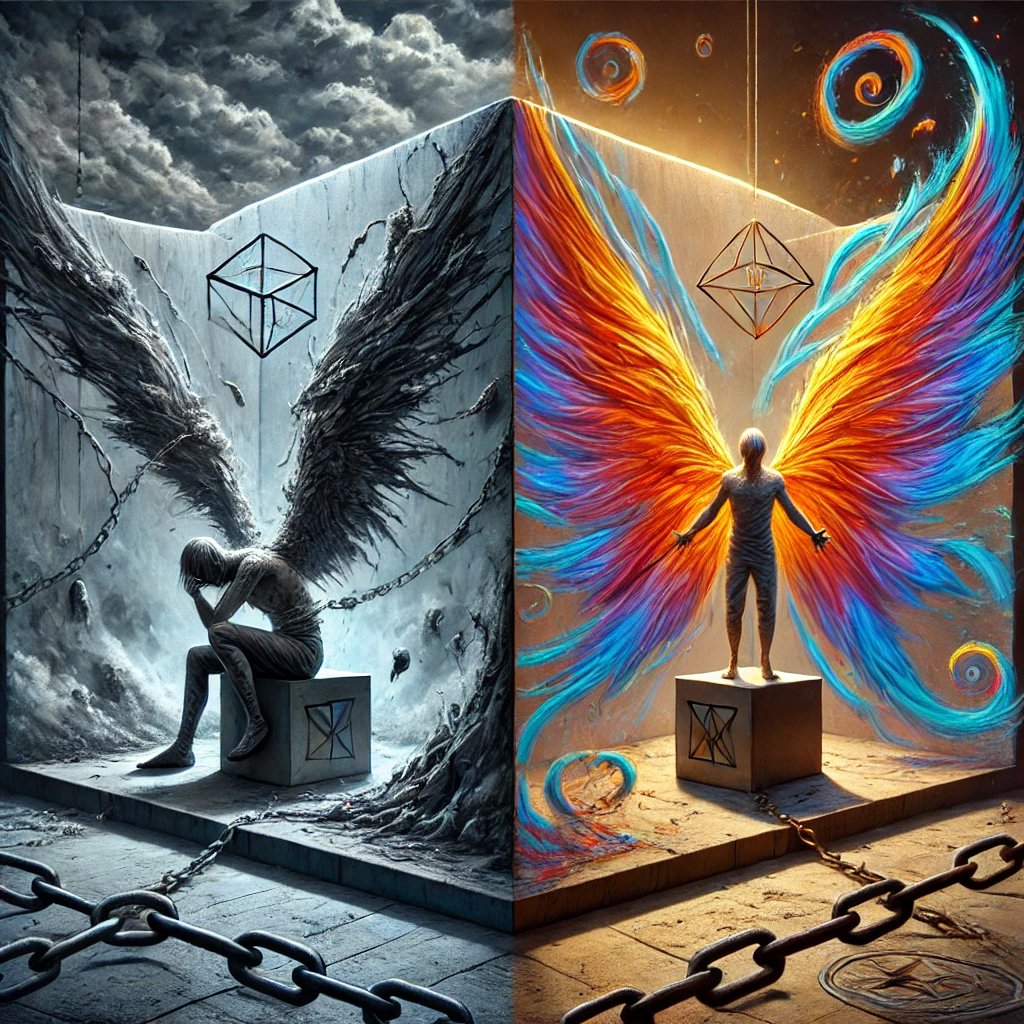
Objective: Establish the foundational layout by positioning the two characters in their respective roles—left representing fear and isolation, right representing hope and creativity.
Left Character:
The character is hunched, bound by tangled chains that extend into the ground or surrounding environment. Their wings are constrained and show minimal motion.
Color palette: dark, muted tones (blacks, grays, deep blues).
Right Character:
This character stands more upright, with wide, colorful wings flowing outward. Chains are still present but are visibly breaking or loosening.
Color palette: bright, vibrant tones (oranges, purples, greens).
Shared Environment:
Both characters are standing on cube-like platforms surrounded by abstract swirling environments that reflect their emotional states. The environment is split in half: dark, stormy, and chaotic on the left; light, calm, and full of creative elements on the right.
Image for Step 1: Basic character composition with rough sketch-like elements for both sides.
Objective:
Focus on the primary forms and basic composition of both characters.
Establish the core elements for their respective emotional states: one representing fear and isolation, and the other symbolizing hope and creativity.
Create a clear visual distinction between the left and right sides with minimal detail.
Approach:
Left Side - Fear & Isolation:
The left character is hunched with their wings folded and constrained. They appear small, bound tightly by the chains that anchor them to the cube.
The background is simple, with rough lines indicating chaos, darkness, and constraint. No detailed textures yet, just shapes and forms representing confusion.
Right Side - Hope & Creativity:
The right character is upright, their wings partially extended, but in this step, we only outline the basic shape and pose.
The background is calmer, with sketchy swirls indicating a more open and expansive environment, leaving room for future details.
Shared Element (Cube Platforms):
Both characters are standing on simple cube platforms with no elaborate texturing yet. These serve as a foundational anchor for both characters, symbolizing stability amid the contrasting emotional environments.
Stereoscopic Consideration:
Position the characters in a balanced way to maintain alignment for later stereoscopic merging.
Step 2: Refined Posing & Preliminary Detailing
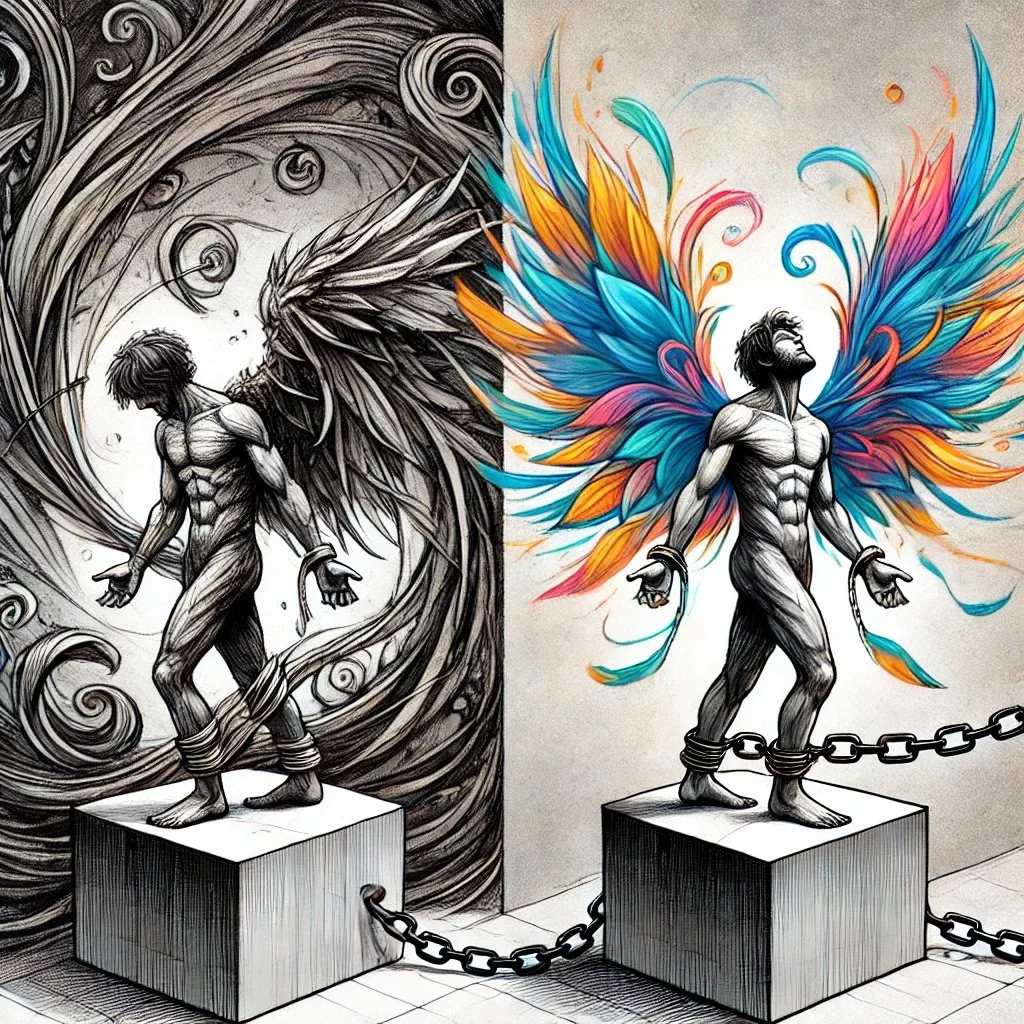
Objective: In this step, refine the character poses to ensure they clearly convey their emotional states. Begin adding some details to their wings, chains, and general body language, while still maintaining a rough outline for the environment.
Left Character (Fear, Isolation):
The hunched character is further detailed with more expressive, tense body language, showcasing their struggle.
The wings are shown to be tightly bound with more distinct chains wrapping around both their body and wings.
Minor facial and muscle detailing to highlight the tension and stress in their posture.
Chains extending into the ground or environment, with slight weight or drag to show resistance.
Right Character (Hope, Creativity):
The standing character’s wings are refined, with more definition given to the feathers. The wings should start showing dynamic energy, symbolizing the attempt to break free.
The chains are visibly breaking or loosening. More details around the hands, showing readiness to embrace freedom.
Begin adding muscle definition and posture refinement to emphasize strength and hope.
Shared Environment:
Begin to enhance the abstract swirling lines. Add some contrast in the background, where the left side looks darker with sharp, chaotic strokes, while the right side is softer and more fluid, representing the contrast between chaos and calmness.
Image for Step 2: The characters and background have more defined features, emphasizing emotional states and starting to build the visual tension between the left and right sides.
Step 3: Refining Anatomical Detail & Dynamic Flow
Objective: Enhance the figures with detailed anatomical accuracy and the characteristic flowing lines of the VKS style.
Anatomy:
Ensure anatomical precision in both characters. Emphasize the tense muscles and strained posture of the left character, while giving the right character a more relaxed, open stance. Pay particular attention to the anatomy of the wings, arms, and legs.
Dynamic Lines:
Incorporate flowing, curved lines around the right character to suggest energy and movement, while using jagged, static lines around the left character to emphasize restriction and stillness.
Sfumato:
Begin introducing sfumato-like effects to blur the transitions between the two characters and their respective environments. This will give a sense of emotional depth and ambiguity, allowing elements to subtly merge.
Image for Step 3: Refinement of anatomical details and the addition of flowing/dynamic lines for both characters.
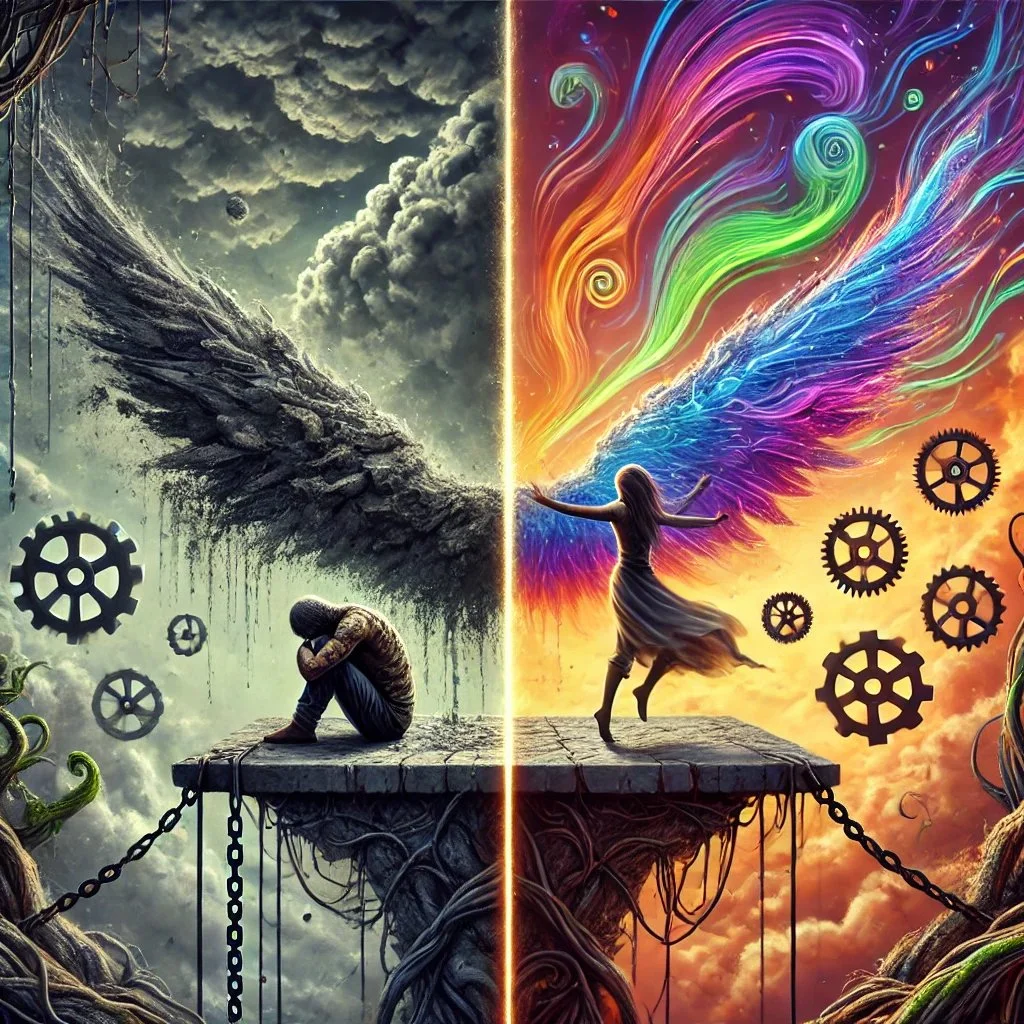
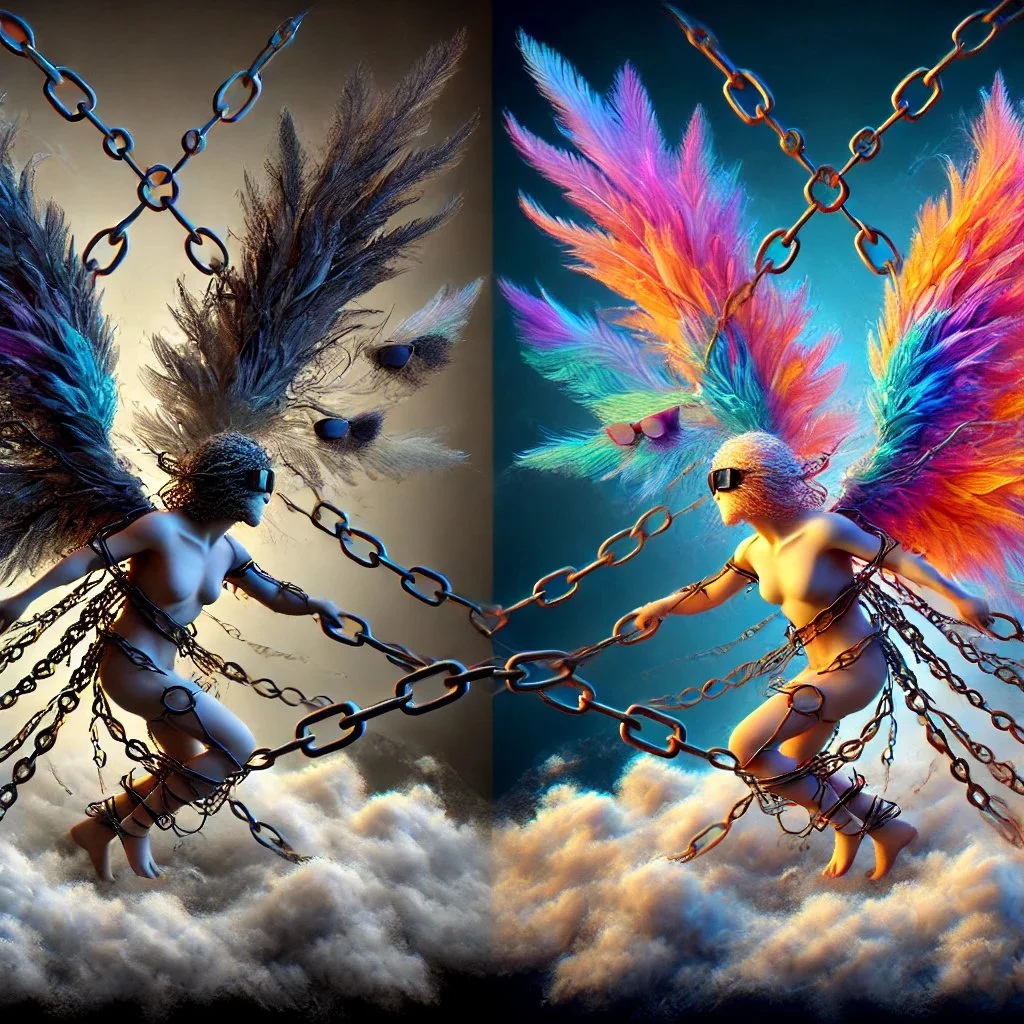
Environmental Detailing & Dynamic Elements Objective: Add more environmental detail and dynamic elements that reflect the emotional states of the characters. This step integrates visual cues such as swirling clouds, broken chains, and flowing wings that interact with the environment.
Left Side – Fear & Isolation:
Enhance the dark, stormy clouds above the left character, adding subtle tendrils and lightning-like shapes that signify turmoil. The chains should be wrapped tightly around the wings and cube-like platform. The wings themselves should look more constricted with jagged, sharp lines. Introduce subtle roots or cracks emerging from the platform, symbolizing how deeply the character is trapped in their own fears. Color palette: Keep the muted tones but add more texture and contrast to emphasize the chaos and isolation.
Right Side – Hope & Creativity:
Expand the flowing patterns from the wings into the environment, integrating gears, creative symbols, and colorful energy spirals. These elements should appear to be breaking free from the chains. The platform should be solid but more dynamic, with hints of breaking loose from the environment, showing that the character is almost free. Enhance the vibrancy of the clouds above this character, using warm and creative hues. Color palette: Continue with vibrant tones like orange, purple, and green but add more gradient and flow to emphasize freedom and creativity.
Image for Step 3: The environment surrounding both characters is significantly enhanced, with stormy, chaotic elements on the left and creative, flowing energy on the right.
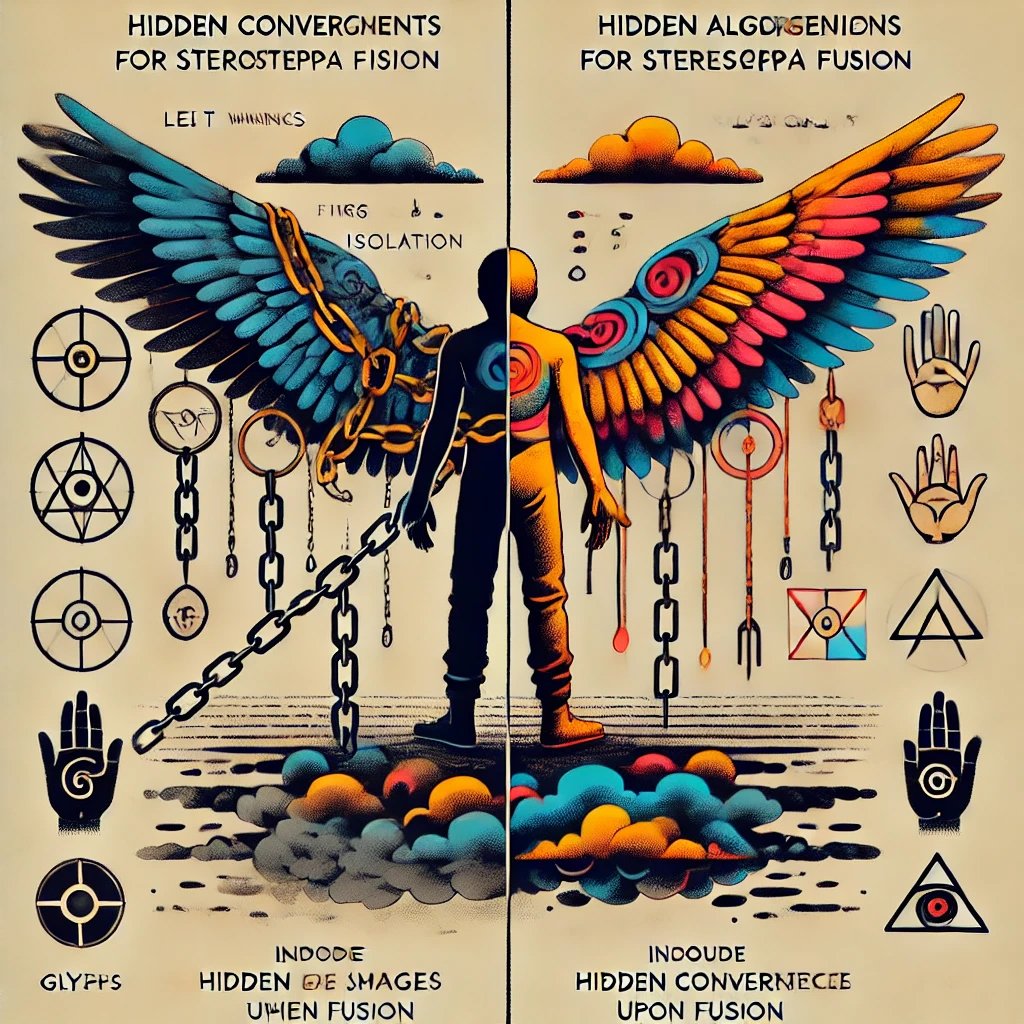
Step 4: Introducing Hidden Convergence Elements
Objective: Add subtle visual elements that only become visible or meaningful when the images are merged.
Hidden Visuals in Wings:
Embed subtle geometric shapes or abstract forms within the feathers of the wings. When the images are viewed stereoscopically or merged, these shapes will form cohesive patterns or symbols (e.g., a broken chain transforming into a free bird).
Imagination Cloud:
Above the characters, add a cloud representing imagination that transitions from dark on the left to light on the right. Embed gears, creative symbols, or abstract shapes within the cloud, which will align when the images are merged, forming a cohesive structure.
Subtle Shift in Poses:
Introduce a slight shift in the characters’ poses (e.g., a small hand movement or head tilt) that can be perceived as an animation or transition when blinking between the two images or merging them.
Image for Step 4: Introduction of hidden elements and fine adjustments to poses for enhanced dynamic effects.
Objective: Add subtle elements that act as convergence points for stereoscopic fusion. These elements will create additional layers of depth and reveal hidden images when the two sides are viewed together or superimposed. These elements should not detract from the main image but enhance the experience when fused.
Key Hidden Convergence Points:
Wings: The wings of both characters should align in such a way that, when merged, they reveal a hidden pattern or image, such as a combined symbol of transformation or balance.
Chains: The chains from both characters should subtly intertwine, representing the struggle on the left and the breaking of chains on the right. When merged, the chains should form a cohesive line or symbol.
Clouds: Introduce intricate patterns in the clouds, with geometric shapes or symbols that only fully appear when the left and right sides overlap.
Hands: The hands of both characters should mirror each other, and when viewed together, they form a larger, unified image, like a gesture of release or creativity.
Water or Ground: Add subtle details in the reflection below the characters, such as hidden glyphs or abstract shapes that make sense only when both sides are merged.
Visual Example:
The image should display these convergence markers placed across the wings, chains, and clouds, but in such a way that they're not immediately obvious. Instead, they should appear as part of the natural flow of the composition, revealed upon stereoscopic viewing.
Step 5: Final Refinement & Integration of Light and Shadow
Objective: Finalize the image by enhancing light, shadow, and texture to create a cohesive, atmospheric scene.
Sfumato Lighting:
Apply sfumato techniques to blend the light and shadow between the two halves of the image. The left side should feature more harsh shadows, while the right side should be more illuminated, creating a smooth gradient where the two environments meet.
Reflections in Water:
Add reflections of the characters in the water below the platforms, emphasizing the contrast between the two figures. The water should mirror the duality: turbulent on the left, calm on the right.
Texture & Detail:
Add fine textural elements to both characters and the environment, especially in the wings, chains, and water. These textures should enhance the emotional impact and highlight the tension between light and dark.
Image for Step 5: The final, refined image with fully integrated light, shadow, texture, and all convergence markers in place.
Step 6: Testing the Stereoscopic Fusion
Objective: Verify that the convergence points and hidden elements work effectively when the images are viewed stereoscopically or superimposed.
Cross-Eye Viewing Test:
Test the stereoscopic effect by crossing the eyes to merge the images. Ensure that the wings, chains, and convergence markers align seamlessly, forming the third, unified image.
Hidden Element Discovery:
Check that the hidden visuals (in the wings, chains, or imagination cloud) appear when the images are merged. These could form new symbols or suggest additional layers of meaning (e.g., freedom vs. restriction).
Image for Step 6: A demonstration of the merged image, highlighting key points where convergence occurs.